Orange Cardamom Rolls

Orange cardamom rolls – the elevated version of the classic cinnamon roll! Soft, fluffy rolls with a hint of citrus, filled with warm cardamom sugar. Then topped with bright and fresh orange glaze. The best part? These rolls are easy! If you’re wary of baking with yeast, give these rolls a go! They’re a simple yeast recipe perfect for beginners. So you get all the delicious flavor of a homemade breakfast rolls recipe, with none of the fuss! Just the smell of these baking will make you a convert!

How To Make Orange Cardamom Rolls

  1. Make The Dough. Combine the dry ingredients in the bowl of your stand mixer, and then add the warm buttermilk, followed by remaining ingredients.
  2. Knead. I use a stand mixer to make this recipe even easier, but you can absolutely do it by hand! Then we let the dough rest for a minute before rolling.
  3. Roll The Dough. On a floured surface, roll the dough into a large rectangle. Then cover with softened butter, and cardamom and sugar. Roll into a cylinder, and cut!
  4. Let Dough Rise. Place the rolls cut side up in prepared baking dishes. Let rise in the oven (my quick bread trick!).
  5. Bake! After the rolls have rise, bake them for about 25 minutes, or until golden brown.

The Star Tool Used To Make Orange Cardamom Rolls

My Microplane zester! Fresh citrus zest is a key player in these orange cardamom rolls. Citrus zest, like the orange zest used in these rolls and glaze, transforms baked goods, you will never go back! Orange zest is brighter and stronger flavor than orange juice alone, so don’t skip it! This Microplane zester is on my list of tools that every cook or baker needs in their kitchen. I’ve owned mine for 10 years now, and I use it at least once a week. By the way, I often give a Microplane zester as a stocking stuffer, and you’ll see it on this year’s gift guide, coming soon!

What Is Cardamom?

If you’ve ever had chai tea, you’ve tried cardamom. It’s one of my very favorite spices! I love its complex flavor. It’s warm, almost minty, and slightly citrusy. One of the reasons it pairs so well with orange in these rolls! Cardamom plays a key roll in most Scandinavian baking, so to me the smell and taste of cardamom brings memories of freshly baked Christmas cookies. You can find cardamom in the spice section of any grocery store – this recipe uses ground cardamom vs whole pods.

Print
clock clock iconcutlery cutlery iconflag flag iconfolder folder iconinstagram instagram iconpinterest pinterest iconfacebook facebook iconprint print iconsquares squares iconheart heart iconheart solid heart solid icon

Orange Cardamom Rolls

5 Stars 4 Stars 3 Stars 2 Stars 1 Star 5 from 1 review
  • Author: Kirsten Bell
  • Prep Time: 60 Minutes
  • Cook Time: 25 Minutes
  • Total Time: 1 hour 25 minutes
  • Yield: 12 Rolls 1x
  • Category: Dessert
  • Method: Baking

Description

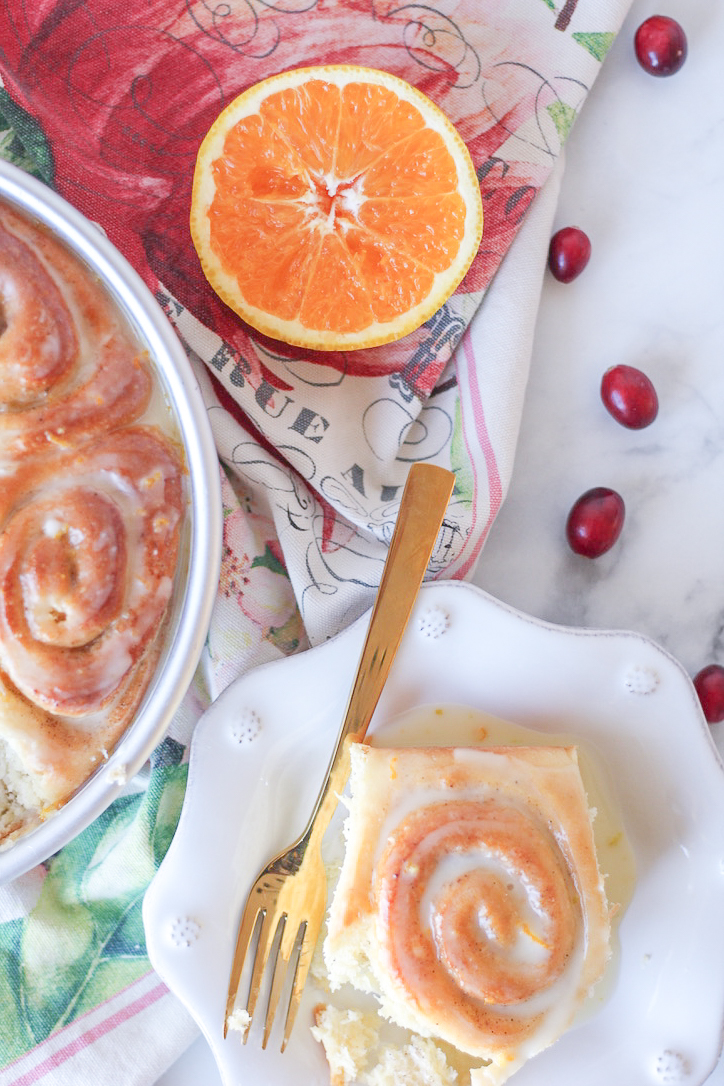
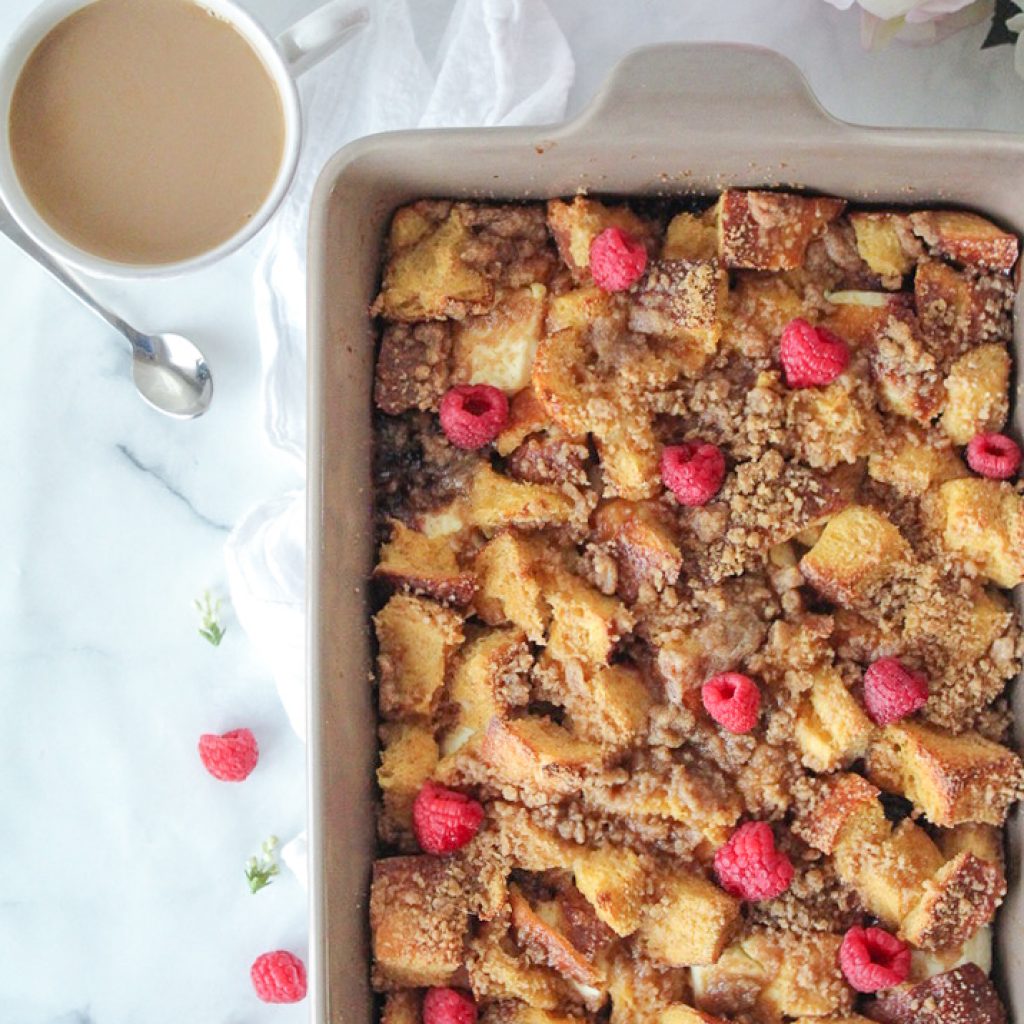
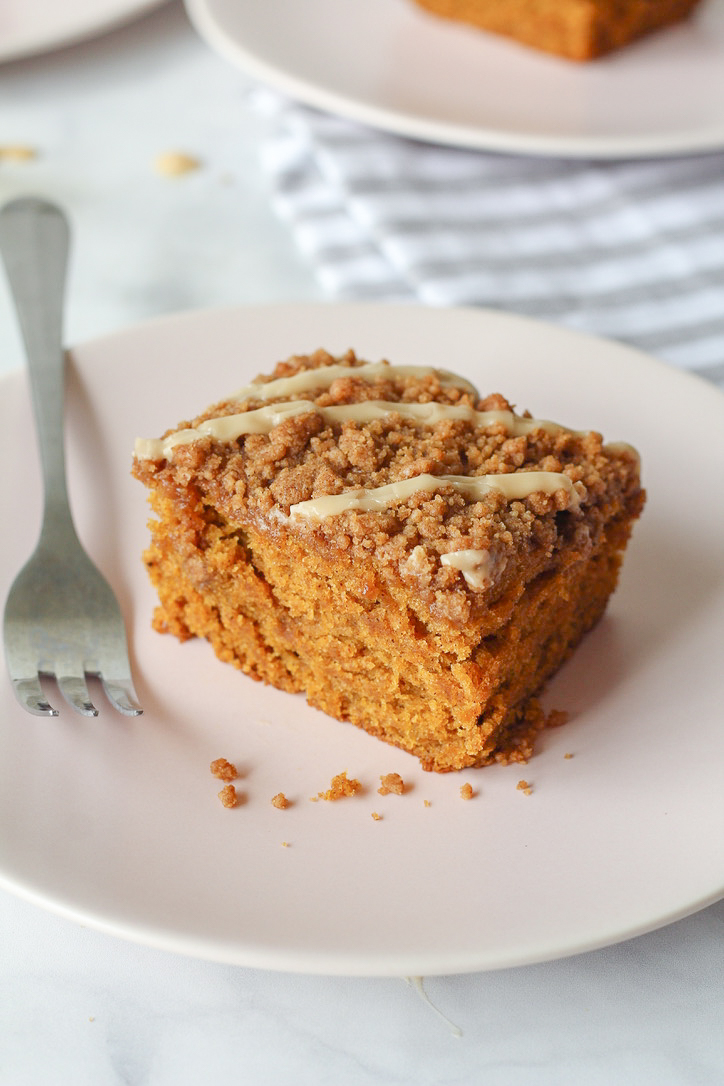
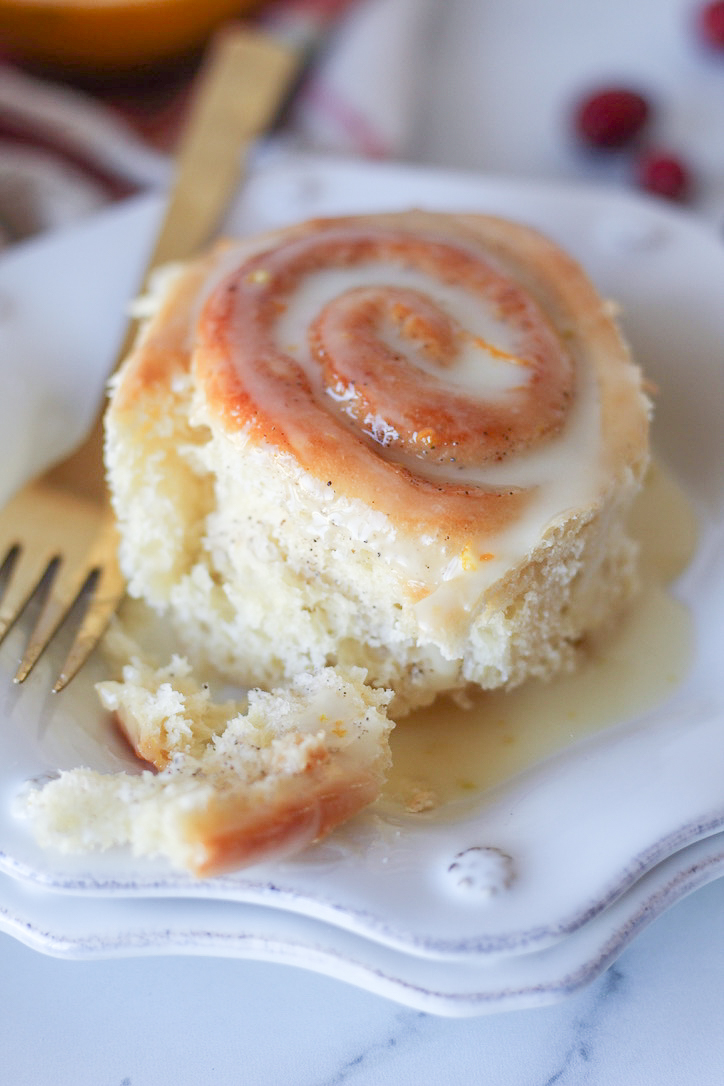
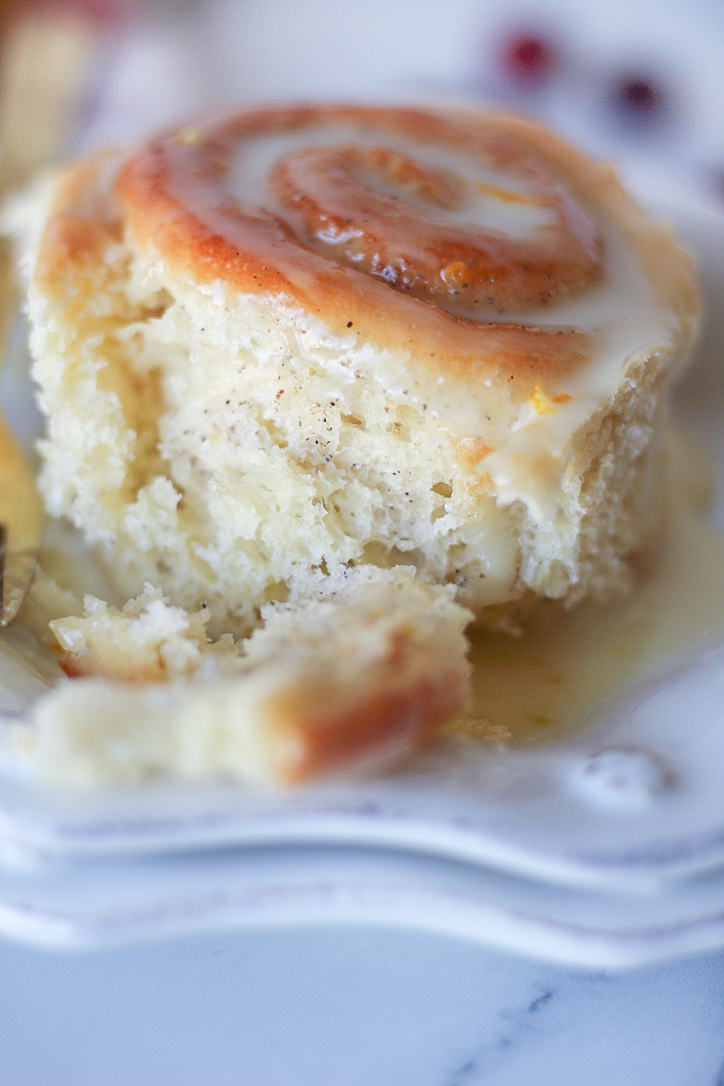
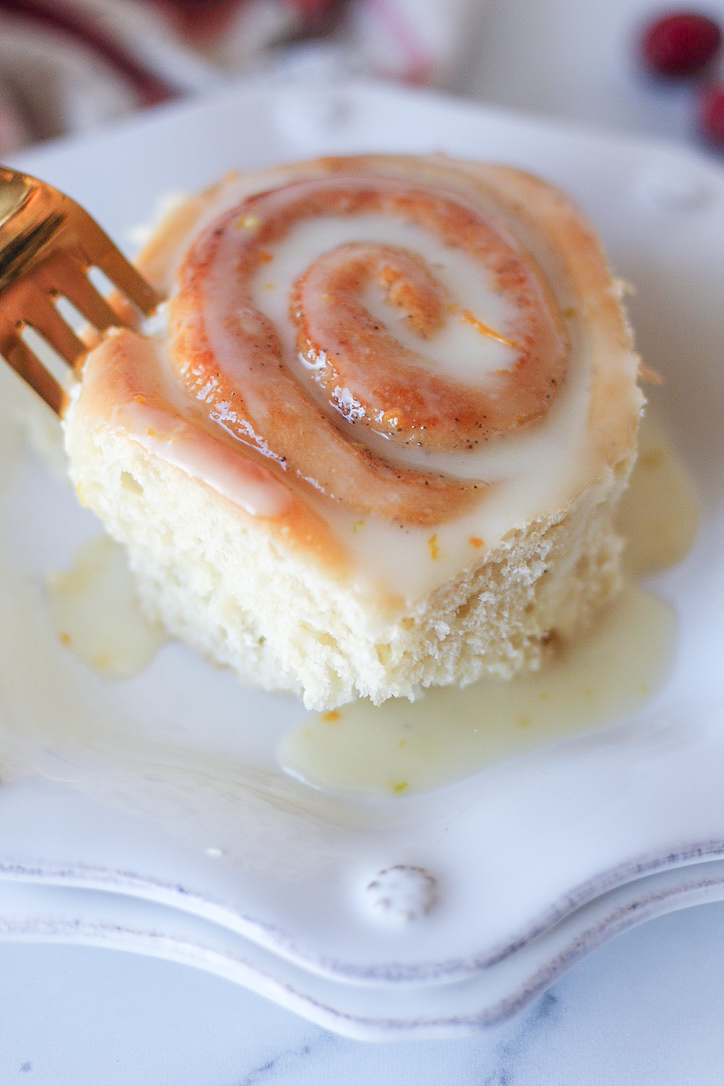
Delicious, simple rolls perfect for a holiday breakfast or brunch!


Ingredients

Scale

Dough.

4 cups all-purpose flour, plus 1/2 cup

1/2 teaspoon salt

1/2 teaspoon ground cardamom

1 (7 g) packet yeast

1/3 cup granulated sugar

1 cup buttermilk

1/2 cup butter, melted

3 eggs

Zest from 1 orange

Cardamom Filling

4 Tbs butter, softened

2 teaspoons ground cardamom

1/3 cup granulated sugar

Orange Glaze

1 1/2 cups powdered sugar

3 Tbs orange juice

Zest from 1/2 orange

1/2 teaspoon vanilla


Instructions

Grease two 9 inch cake pans, and set aside. Preheat the oven to 200 degrees F.

Mix together the dry dough ingredients in the bowl of the stand mixer (fitted with the dough hook) with a spoon. Measure out the buttermilk in a liquid measuring cup, and add the butter. Heat in the microwave in 30 second increments, stirring between each, until the butter is melted, and the mixture is hot to the touch. Pour the buttermilk mixture into the flour mixture, and stir together. Add the eggs and orange zest, and then knead for about 5 minutes on medium-low speed with the dough hook. After 5 minutes, cover the dough with a damp cloth and let rest for 5 minutes. Remove the dough from the bowl (it will be sticky) to a floured work surface. Knead briefly, adding flour as necessary, a small sprinkle at a time, until the dough is no longer sticky.

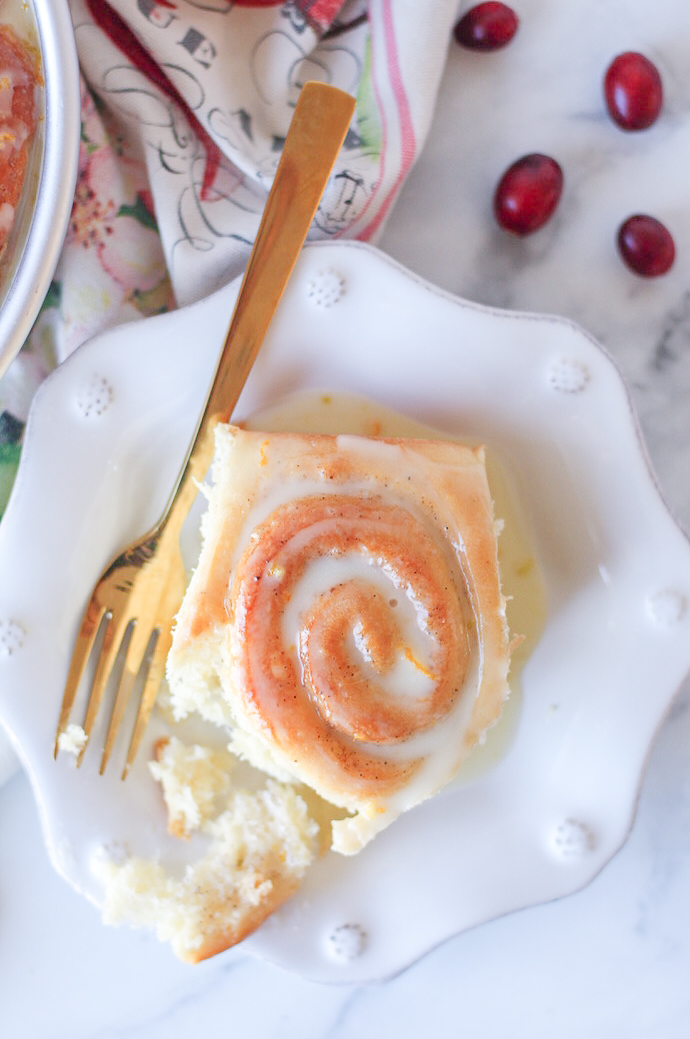
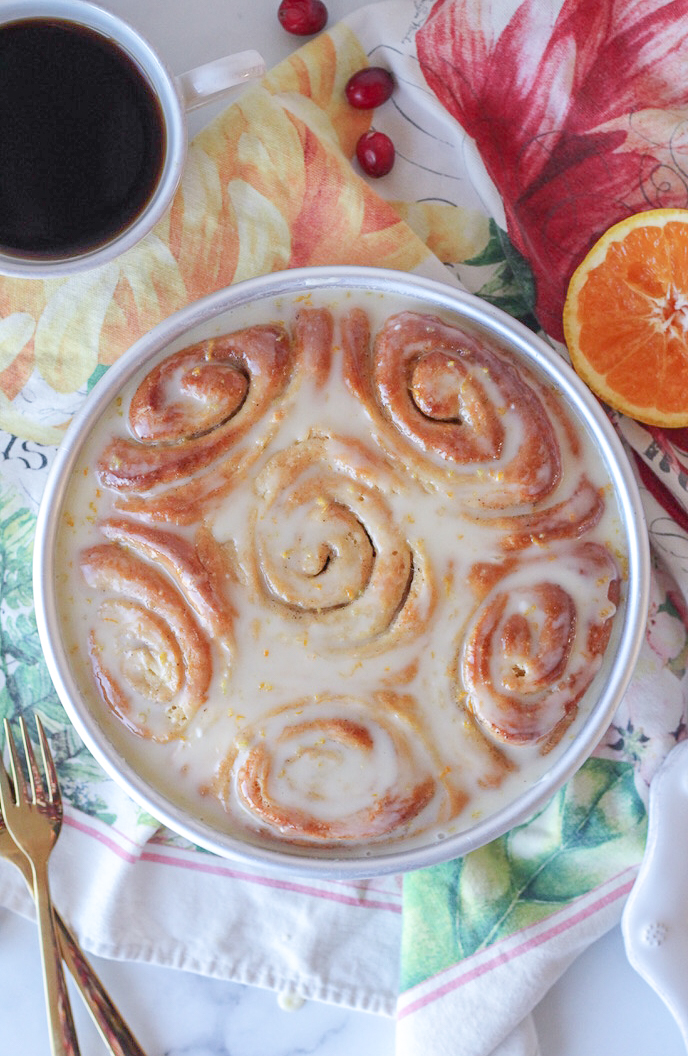
Roll the dough out into a rectangle, about 1/2 inch thick. I use my hands to shape the dough, and then roll it out with my pin. Spread the softened butter for the filling over the entire rectangle, then sprinkle the cardamom filling evenly. Roll the dough, starting with the side closest to you. Pinch the seam once fully rolled. Cut the roll into 12 even pieces, and distribute the pieces cut side up, between the two prepared cake pans.

Cover loosely with foil, and put in the preheated oven, then turn the oven off. Allow the rolls to rise in the oven for about 45 minutes, or until doubled. Remove the rolls from the oven. Preheat the oven to 350 degrees F. Once preheated, bake the rolls uncovered for about 25 minutes, or until lightly browned.

Prepare the glaze: combine the glaze ingredients, and pour over the baked rolls. Serve warm!


Pumpkin Sheet Cake with Cinnamon Glaze

The perfect, easy one-bowl recipe for the holidays: pumpkin sheet cake with cinnamon glaze! This easy pumpkin sheet cake is fall dessert at its finest. Buttery, moist lightly spiced pumpkin cake. All the soft, fluffy cake you’d expect in a sheet cake! Then topped with silky cinnamon glaze that hardens just enough to form a perfect crust.

This cake is so quick to throw together, and can be made ahead of time for easy holiday entertaining. No need to dirty every dish in your kitchen for a super tasty and special holiday dessert!

Why glaze instead of frosting? I love that glaze is a lighter flavor than frosting, and calls for way less sugar! No sugar comas here! It really lets the flavors of the cake shine, and is easier to make than buttercream too. So really, it’s just overall perfect for this pumpkin sheet cake!

Tools Needed For Pumpkin Sheet Cake with Cinnamon Glaze

  • Mixing Bowls! I love this set of mixing bowls for everything from cakes, to homemade doughnuts, to prepping casseroles!
  • Baking Dish: This is my favorite baking dish. I love baking in ceramic! It retains heat so well, which means shorter cooking time and a more moist baked good!
  • Cooling rack: If I’m in a hurry, and need the cake to cool quickly, I like to line my baking dish with parchment paper, lift the whole cake out, and set it on a cooling rack before pouring on the glaze.
  • Metal measuring cups and measuring spoons. I love how solid these are, they will last forever!
Print
clock clock iconcutlery cutlery iconflag flag iconfolder folder iconinstagram instagram iconpinterest pinterest iconfacebook facebook iconprint print iconsquares squares iconheart heart iconheart solid heart solid icon

Pumpkin Sheet Cake with Cinnamon Glaze

5 Stars 4 Stars 3 Stars 2 Stars 1 Star No reviews
  • Author: Kirsten Bell
  • Prep Time: 10 Minutes
  • Cook Time: 35 Minutes
  • Total Time: 45 minutes
  • Yield: 12 Slices 1x
  • Category: Dessert
  • Method: Baking

Description

Easy, moist and delicious pumpkin sheet cake with cinnamon glaze! The perfect make-ahead holiday dessert recipe!


Ingredients

Scale

For The Cake:

1 can (15 oz) pumpkin puree

1 cup granulated sugar

1 cup packed brown sugar

1 cup butter, melted

1 teaspoon vanilla extract

2 eggs

1/2 cup milk

2 cups flour

2 teaspoons baking soda

2 teaspoons pumpkin spice

1/2 teaspoon salt

For The Glaze:

2 1/2 cups powdered sugar

1/3 cup milk

1 teaspoon cinnamon

1 teaspoon vanilla extract


Instructions

Preheat the oven to 350, and grease a 9×13 baking dish. Set aside.

In a large mixing bowl, whisk together the sugar through milk. Add the flour, baking soda, pumpkin spice and salt to the pumpkin mixture, and mix together with a spatula until no streaks of flour remain and the batter is smooth. Pour the batter into the greased baking dish, and bake for 35-40 minutes or until a toothpick comes out with moist crumbs.

Allow the cake to cool for at least 15-20 minutes. Meanwhile, make the glaze! Mix together all the glaze ingredients in a small bowl, and pour over the cooled cake. Let glaze harden, and then serve.


Love Pumpkin? Try These Pumpkin Recipes Too!

Baked Maple Doughnuts

Baked maple doughnuts – a classic dessert in a healthier twist! These doughnuts are full of delicious maple flavor, but skip the deep fry. Maple doughnuts were always my favorite growing up, and really the only traditional doughnut that still tempts me. Something about that sweet glaze gets me every time!

Have you made baked doughnuts yet? They’re so easy, and a really fun weekend treat. Who wouldn’t want to wake up to warm, freshly baked doughnuts! These baked maple doughnuts come together in just a few minutes, with just a mixing bowl and spatula. No stand mixer (or even hand mixer) required!

If you don’t have a doughnut pan yet, I highly recommend grabbing one! (I’ve linked my favorite at the bottom of the post!) I have a number of baked doughnut recipes on my blog, so you’ll use it again and again!

How To Make Baked Maple Doughnuts

These doughnuts take fewer than 20 minutes, start to finish, and are so easy!

  1. Preheat the oven, and grease your doughnut pans

  2. Whisk together the dry ingredients

    By combining the dry ingredients first, we reduce the amount of mixing when the wet ingredients are added. Less mixing equals a lighter, softer doughnut. And that means yummy!

  3. Combine the wet ingredients

  4. Add the dry ingredients to the wet ingredients, and stir with a spatula until combined and batter is smooth.

  5. Spoon the batter into a big plastic bag or piping bag, and cut a small hole in a corner. Then pipe the batter into each well of the doughnut pan, about 3/4 full. Bake!

  6. Combine all the glaze ingredients in a small bowl, and then dip the cooled doughnuts. Allow glaze to harden. Enjoy!

Print
clock clock iconcutlery cutlery iconflag flag iconfolder folder iconinstagram instagram iconpinterest pinterest iconfacebook facebook iconprint print iconsquares squares iconheart heart iconheart solid heart solid icon

Baked Maple Doughnuts

5 Stars 4 Stars 3 Stars 2 Stars 1 Star No reviews
  • Author: Kirsten Bell
  • Prep Time: 10 Minutes
  • Cook Time: 9 Minutes
  • Total Time: 19 minutes
  • Yield: 810 Doughnuts 1x
  • Category: Dessert
  • Method: Baking

Description

Easy and delicious baked maple doughnuts! A perfect homemade treat for weekend breakfasts.


Ingredients

Scale

For the Doughnuts:

1 cup all-purpose flour

1 teaspoon baking powder

1/2 teaspoon baking soda

1/2 teaspoon salt

1/2 teaspoon cinnamon

1/4 teaspoon nutmeg

1 egg

1/4 cup brown sugar

1/4 cup buttermilk

1/4 cup whole fat vanilla yogurt

2 tablespoons butter, melted

1 teaspoon vanilla extract

For The Glaze:

3 tablespoons milk

3 tablespoons maple syrup

1 teaspoon maple extract

2 cups powdered sugar


Instructions

Preheat the oven to 350 degrees F, and thoroughly grease two doughnut pans. Set aside.

Combine the dry ingredients, flour through nutmeg in a medium mixing bowl, and set aside. In a large bowl, whisk together the egg and brown sugar until combined. Add the buttermilk and yogurt. Finally, add the butter and vanilla extract, and whisk until all the wet ingredients are smooth. Add the dry ingredients to the wet, and combine with a spatula.

Transfer the batter to a large ziplock bag or pastry bag. Cut a small hole in the corner of the bag, and pipe the batter into the doughnut pans, filling each well about 3/4 full. Bake 8-10 minutes, or until the edges are slightly browned and a toothpick comes out with moist crumbs. Allow to cool for a few minutes, and then transfer to a cooling rack.

For The Glaze:

Combine the ingredients in a small mixing bowl, and allow to sit for about 5 minutes. Give the glaze another stir, and then dip each doughnut into the glaze. If you like a thicker glaze, allow the glaze to dry on each doughnut and then dip again!


Tools Used In This Post:

Raspberry French Toast Casserole

Raspberry French Toast Casserole. Cinnamon-coated bread, fresh raspberries, and tangy cream cheese, topped with a delicious brown sugar streusel. Oh and easily prepared the night before. In one bowl. You guys, it really doesn’t get better than this! Brunch just got elevated, and easier!

easy french toast casserole

French toast holds a special place in my heart. When Jordan and I were first dating, he would come visit me in Seattle and made french toast for me and my roommates every time. It was so sweet and thoughtful! Now that we have a family, I’m all about taking the flavors of french toast that we love and making the process a little easier – by making french toast into a casserole!

easy brunch recipe
french toast casserole

How To Make: Raspberry French Toast Casserole

Let’s dive into the flavors, shall we? This raspberry french toast casserole starts by making a quick and simple cinnamon egg custard. Just like you would for traditional french toast. Secondly, we coat the cubed bread in the custard. Thirdly, we layer the soaked bread in a casserole dish with cream cheese and raspberry preserves, and let sit overnight. (I just ordered this beautiful ceramic casserole dish, and right now it’s on sale!)

The next morning, we make the brown sugar streusel, sprinkle it over the casserole, and bake! Then let your nose (and stomach!) go wild as you smell it baking, because let me tell you. It smells amazing. When it’s done baking, serve with your favorite french toast extras like maple syrup and fresh raspberries. Divine.

simple french toast casserole
easy raspberry french toast casserole

What Bread Should I Use?

Just like with traditional french toast, the type of bread that you use in this raspberry french toast casserole matters. My three favorites to use are Brioche, Challah and French Bread. These are all soft, spongy breads that are amazing at soaking up the custard for a delicious casserole. None of them should have hard crusts, you should easily be able to press into them with the pad of your thumb.

Fun fact: Did you know that french toast originated from a french recipe called “pain perdu”, which means “lost bread”. It was created as a way to use stale bread instead of throwing it out! This recipe uses fresh bread vs stale, but hey! Good to remember for when I forget to seal the bread bag, right?

easy breakfast recipe
Print
clock clock iconcutlery cutlery iconflag flag iconfolder folder iconinstagram instagram iconpinterest pinterest iconfacebook facebook iconprint print iconsquares squares iconheart heart iconheart solid heart solid icon

Raspberry French Toast Casserole

5 Stars 4 Stars 3 Stars 2 Stars 1 Star No reviews
  • Author: Kirsten Bell
  • Prep Time: 15 Minutes
  • Cook Time: 40 Minutes
  • Total Time: 55 minutes
  • Yield: 12 Servings 1x
  • Category: Breakfast
  • Method: Baking

Description

Delicious overnight french toast casserole! With cinnamon-soaked bread, fresh raspberries and tangy cream cheese, this will become your go-to breakfast recipe.


Ingredients

Scale

1 (1 lb) loaf of brioche, challah or French bread, cut into 1 inch cubes

8 eggs

2 cups whole milk

1 tablespoon vanilla extract

1 teaspoon cinnamon

1/2 teaspoon salt

8 oz cold cream cheese, cut into 1/2 inch cubes

1/2 cup raspberry preserves

Streusel Topping

1/3 cup brown sugar

1/3 cup all-purpose flour

1/2 teaspoon cinnamon

4 tablespoons salted butter, cubed


Instructions

Butter a 9×13 casserole dish, and set aside.

In a large mixing bowl, whisk together the custard ingredients, eggs through salt. Add the bread cubes, tossing with the custard to coat. Spread about half the bread cubes into the bottom of the prepared casserole dish. Evenly top the bread with cream cheese cubes and raspberry preserves. Cover with the remaining bread cubes, and pour any leftover custard over top.

Cover with foil, and allow to soak for at least 3 hours to overnight.

When ready to bake, preheat the oven to 350 degrees F. Stir together the brown sugar, flour, and cinnamon. Rub the butter into the brown sugar mixture with your fingers until it resembles bread crumbs. Sprinkle the streusel evenly over the casserole.

Bake uncovered for 40-45 minutes, or until bread is lightly golden and custard is set.

Allow to cool for 5 minutes, and then serve with maple syrup, fresh raspberries, whipped cream, or extra raspberry preserves!


Want More Breakfast Recipes? Check These Out:

Pumpkin Coffee Cake With Streusel

I am such a huge fan of coffee cake. It’s so easy and delicious, and quick to throw together whenever the mood strikes! This pumpkin coffee cake with streusel might be my very favorite fall recipe at the moment. The cake is moist and full of pumpkin and spice flavors, the streusel is perfectly buttery, and then with the vanilla drizzle? It’s seriously impossible not to fall in love at first bite! And the best part is that it’s so darn easy to make! This coffee cake is a staple at our house – and I bet it will become one at yours too!

This Celebrated Life